
Creating the book...
All images and text © Anna Grossnickle Hines 2005
All images and text © Anna Grossnickle Hines 2005
|
|
Creating the book...
All images and text © Anna Grossnickle Hines 2005 |
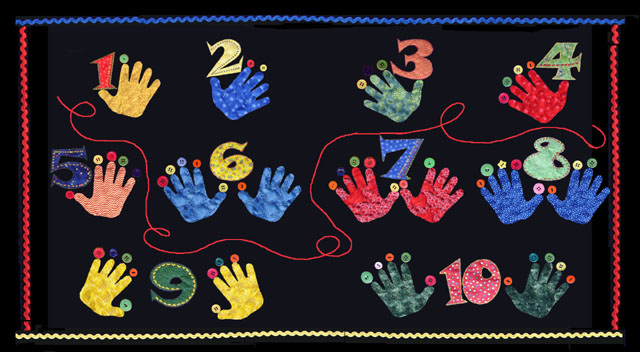
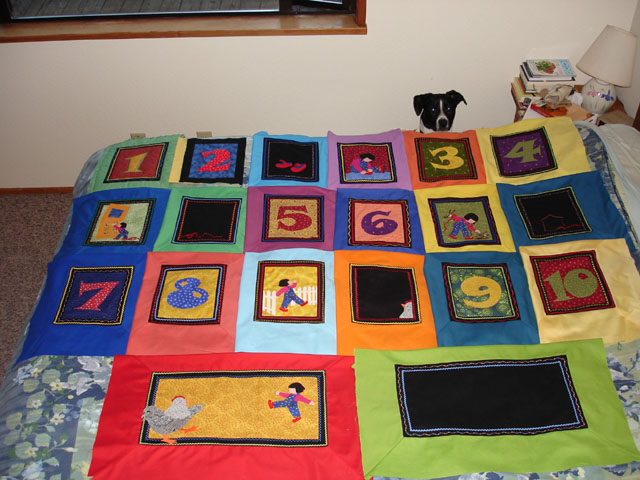
| After I made a quilt using the nursery rhyme "1, 2, Buckle My Shoe", and gave it to my granddaughter, my daughter suggested that it would make a good picture book. I thought it was a great idea and set to work. |
|
STAGE ONE: Making a dummy from the quilt.
|
| The first step in converting the quilt into a picture book was to divide it into pages and make a little dummy. I saw this a possible board book, or possibly a lift-the-flap similar to my book, Whose Shoes?. The 6 inch blocks I'd used in the quilt seemed like a good page size for my dummy. Working on my computer I put parts of the quilt together to make the pages. |
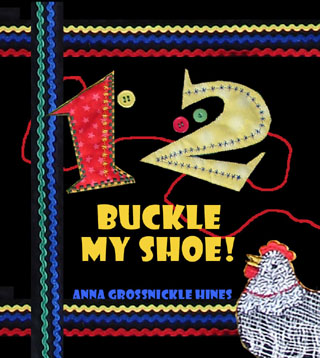 |
| For the cover I used PhotoShop to "steal" elements from quilts. |
 |
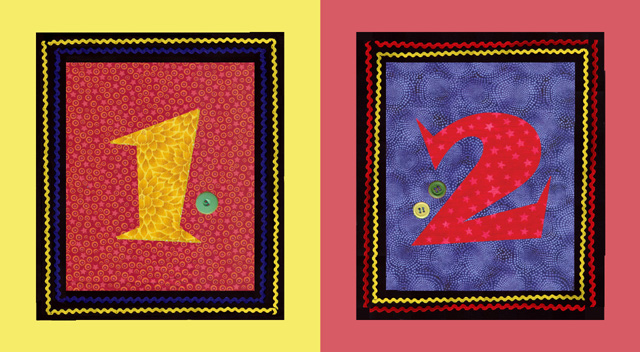
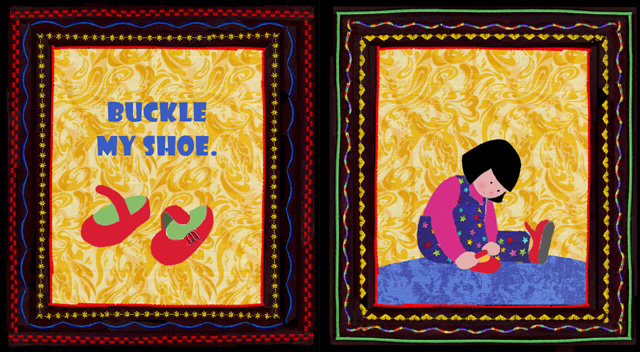
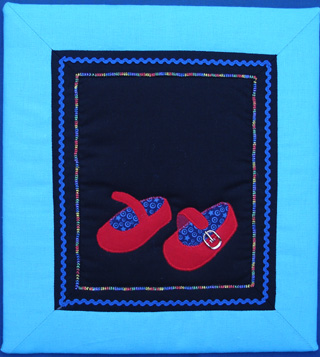
| Number pages appear just as they do in the quilt... |
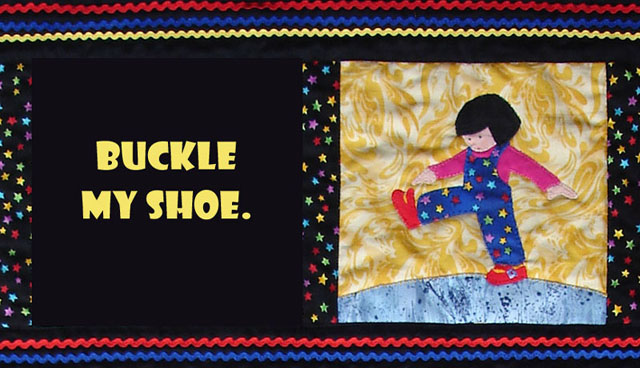 |
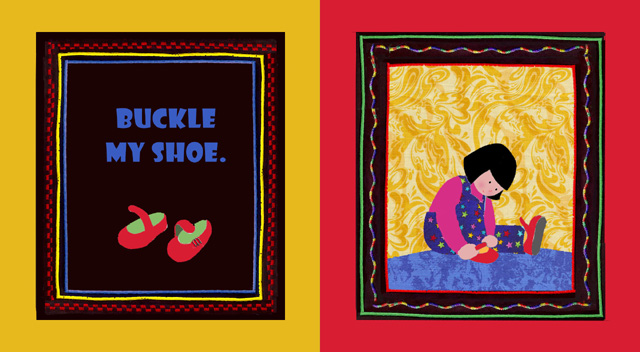
| ...and for story pages, I added room for the words. |
 |
| I didn't change any of the pictorial elements, but did suggest in a cover letter that they could be changed to make a more cohesive story line.
Allyn Johnston, at Harcourt, said yes, to my proposal--actually she called and said, "There is something fresh and great about this. As soon as I opened the package I knew it was something fresh and wonderful." That's the kind of response you dream of getting from an editor. She called me in September of 2006, made the official offer in November, and then turned the project over to Jeannette Larson with whom I'd worked on Whose Shoes? and Which Hat is That?. They were eager to get the book out and I said I thought I could get the art done in March. I was delighted to be working with Jeannette again. When we finally had our first conversation in early February--even when there is great enthusiasm, it seems the wheels in a large publishing house can turn slowly--Jeannette was thrilled to hear that I intended to make all new quilts for the book. We would take the original quilt as a starting point and go from there. She said they, the team at Harcourt, thought the book should be bigger, more like 8 inches, and was eager to hear my ideas for developing the story line. |
|
STAGE TWO: Developing the story idea and making a larger dummy.
|
 |
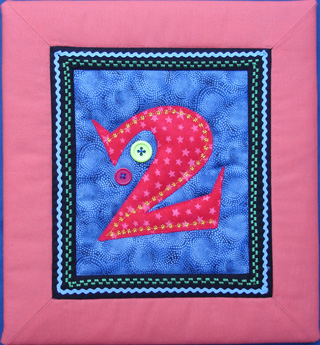
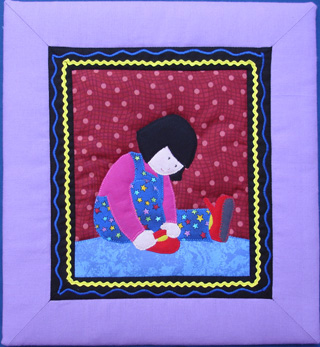
| I worked on an eight inch dummy, developing the story pages, beginning with the child buckling her shoe. Wanting to carry the chicken idea from beginning to end, I also added a hint of the hen in the picture on the wall.
Jeannette had said she didn't necessarily wanted the images to be bigger, and I liked all that black with bright stars and rick rack on the quilt, so I expanded to borders. |
 |
| She'd also said they loved the buttons and would like to see more 3-D elements so in this picture I experimented with lace and ribbon flowers. To help the story along, I've introduced and string on the ground here which will reappear on following pages. |
 |
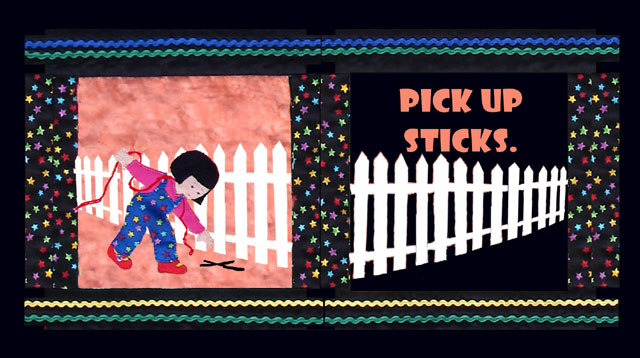
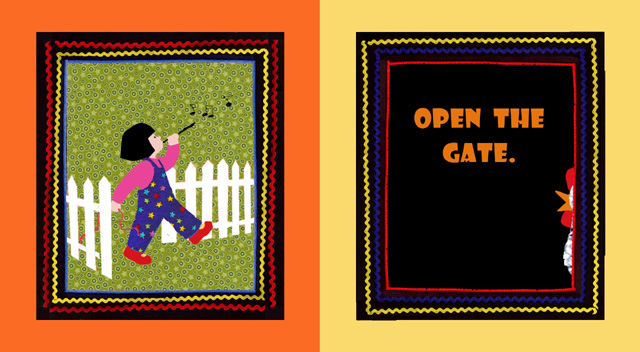
| On the "pick up sticks" page the child has her string, and the picket fence is introduced, which includes the gate for the next page. If you look closely you can see the tail of the hen behind the fence, too. |
 |
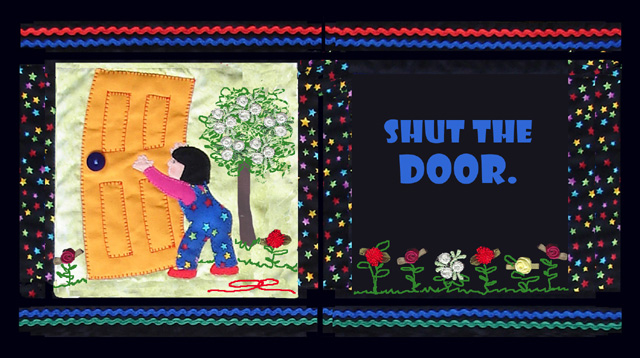
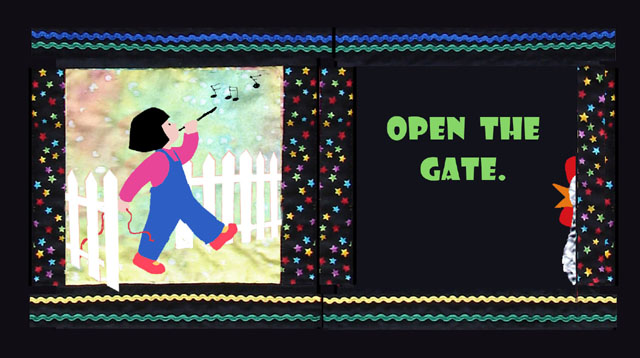
| For the quilt I had used the line, "Lay them straight", which doesn't really add a lot to a sequential story. Another version, equally well-known, is "Shut the gate". It could work story-wise but seemed too much like , "Shut the door", so I took the liberty of changing it to "Open the gate." Now the child has her string, and the stick which she is using as a flute. A nice celebratory touch, I thought.... |
 |
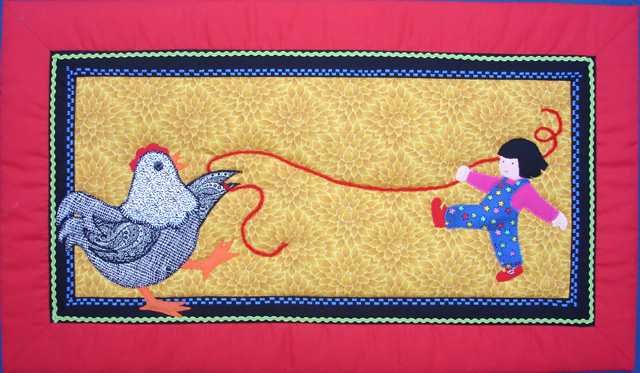
| ...leading to a dancing hen on the last story spread. Jeannette thought the big hen in the original quilt was fun, and suggested that it could be even bigger. I liked the idea and wanted to make the ending page a real party. |
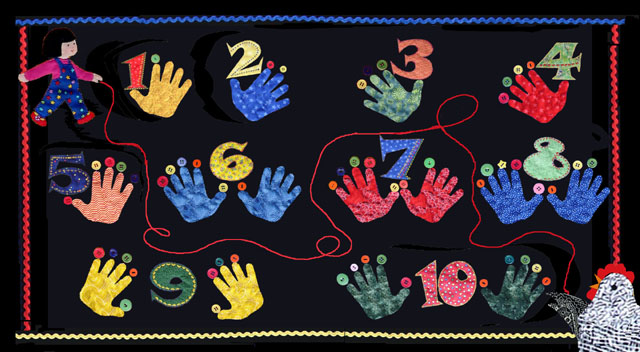 |
| Although I had seen this as a board book, the Harcourt team did not, which meant we could use more pages. They suggested adding a fun spread at the end. I immediately thought of the hands that I'd had to leave out of the quilt. Then I added child, hen, and string to carry the story line onto this page.
I sent the new version off to Jeannette and the Harcourt team on February 11 and they came back to me with even more ideas! We did a lot of give and take on this book, which was at times frustrating, but mostly exciting to have the editor and designer so involved in the process. One of the main comments on this versions was that the picture pages had become too complicated. They preferred that I leave out the picture of the hen on the "Buckle my shoe" page, and the child and hen on the hands page. Though they liked the idea of something on the other story pages, they felt those story hints should be simpler. So I simplified, liked the results, and sent revised PhotoShop sketches on February 19. |
 |
 |
 |
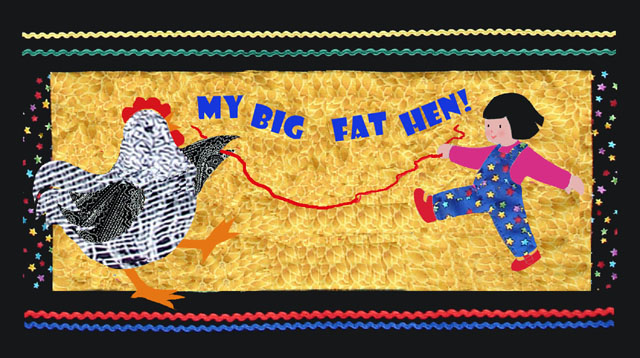 |
| For this page I took out the horizon line and brought the hen closer, breaking the edge of the border. |
 |
| Here I've simplified by taking out the child, string and buttons, but it seemed a little too disconnected that way... |
 |
| ...so I put the string back in. |
| With a March deadline and all the enthusiasm, I expected just a few minor changes, and the okay to start on the final art. And I expected to hear right away. But I didn't. I waited...and waited...for almost a month. Finally, I heard from Jeannette on March 14th.
The team, while pleased with the changes I'd made, surprised me with even more ideas this time. While I'd waited, designer Lydia d'Moch had used my images, to create a bigger mock-up of the book. Lots bigger! Up to 10 by 11 inches with big bright borders around every page. I wasn't so sure, but I liked that they were excited by what was happening with the book, and the bigger size, they said, would give the book more impact. Impact is a good thing. And they said the starry fabric had to go. (I loved my starry fabric.) I asked Jeannette if they were sure about that, and about the size. They were sure. It grew on me. So now the questions were, what to do with the inner borders, and what fabrics would I use? Jeannette and Lydia had some definite ideas about which ones they liked best. |
|
STAGE THREE: Making an even larger dummy using scanned fabrics
|
| I scanned fabrics and began making PhotoShop "sketches" using real fabrics at actual size. I also made and scanned samples of fancy stitching, baby rick-rack, and cording to try in the borders. I worked up a number of variations. |
 |
|
Should I use patterned fabric as the background on the text pages?
|
 |
|
Or black?
|
 |
|
Patterned?
|
 |
|
Or black?
|
 |
|
I liked the black.
|
| I came up with an idea for how to use the "sticks" on the text page, and decided to make them out of yarn. It was still a bit tricky to find a yarn that looked "stickish" and would show up against the black and whatever ended up as the background on the story page. A quilting friend happened to have a variegated yarn that was just the right thing. |
 |
| But I still wasn't sure I really wanted to give up the black borders. I liked the way the black made the colors pop, so I kept playing with the possibilities. What if I made the inner block larger and had just a black border instead of the double border?
On March 20 I sent these sketches along with all the bright bordered ones above. |
 |
 |
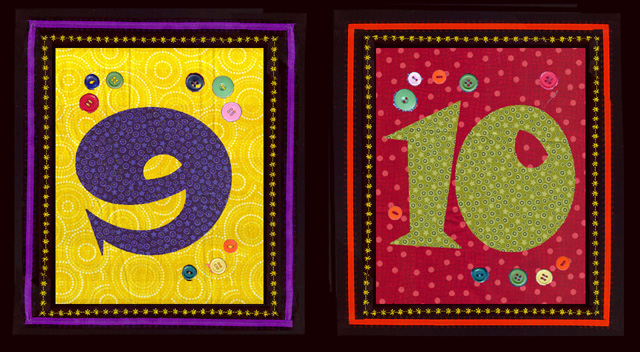 |
| Jeannette got back to me immediately, excited with how great the book was looking. Their favorite was this 9 10 spread, because of the fabric choices and stitching on the borders. We set May 1 as the new deadline. |
 |
| But as much as they liked what was happening with the book, they had still more suggestions. They definitely wanted the bright borders, and no rick-rack, and no fancy stitching around the numbers. |
|
STAGE FOUR: Starting to sew...while still working out the details.
|
|
Yikes! I was feeling a little bamboozled. Large format, no starry fabric, minimal black, no rick rack, no fancy stitching around the numbers. What had happened to the original idea they were so excited about? I expressed my concerns to Jeannette and she responded with an apology and lots of reassurance--I think editors must take psych courses! It was indeed my book, and if they'd gotten a bit carried away in their suggestions, it was just because it was such a fun project. I suggested that I do a couple of quilts so we could talk about the "real thing" rather than PhotoShop sketches which, despite actual scanned fabrics, can only approximate the end product. Good idea! |
 |
| I did a pair of samples with the black borders, the way I thought I wanted it, and another with bright borders, but keeping the rick-rack and fancy stitching on the numbers. Once I had done them, I agreed that while the black bordered pages were beautiful individually, it would be too much to have that much black page after page. I did, however, still want to use the rick-rack and stitching around the numbers. |
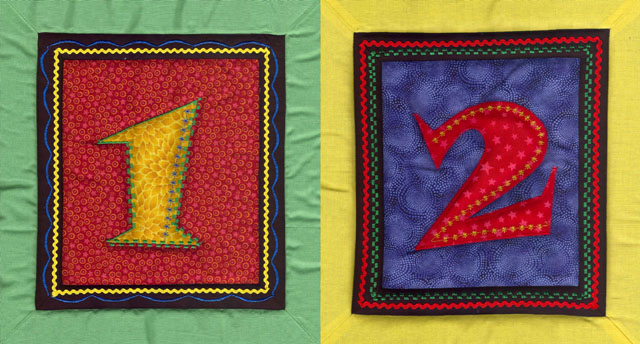 |
| I FedExed the samples to Jeannette and we had a delightful conversation in which we agreed on bright borders with rick-rack and stitching and thanked one another for mutual contributions to a project that was looking good. Hurrah!
My previous books illustrated with quilts, all published by Greenwillow, had been scanned the same way they would have been had they been done with watercolor or colored pencils. For this book for bery young children, the Harcourt team knew from the beginning that they wanted a softer, more puffy look. The quilts would be photographed rather than scanned. The samples raised concerns that too much puffiness might create too many shadows, so I made more sample quilts using a less puffy batting and none at all. (Batting is the layer of padding between the top and back layers of a quilt that gives it that nice cushy look and feel.) I completed these by the end of March, and Pascha Gerlinger, production manager, sent them out for transparencies and test prints. Meanwhile, I was still working out the final fabric and color choices. I wanted to use the same fabric combinations for the hands and numbers on the last spread as on the number pages, the numbers being the same and the backgrounds being used for the hands. Balancing the colors and patterns was a little tricky. In fact, we thought it was all set, when I realized that both 8 and 9 were blue numbers on bright yellow backgrounds. It would seem a simple enough change, but caused a chain reaction, ending up with changes on four spreads. |
 |
| Photo: April 5, 2007
Until I knew what kind of batting I'd be using I couldn't do any finished quilts, but I could start making "parts". I began with the story elements, fusing them together before putting them on the backgrounds, and adding the black inner borders. I was still shopping, and exchanging fabrics, and sending revised images to Jeannette and Lydia for their input as I worked. In mid-April I had a couple previous commitments and had to take some time off. It was during that time that a visiting friend told me I had a problem with my hen. Those of you who are familiar with hens and roosters may notice here, and in the previous sketches, that I've given my hen a wattle. My chicken loving friend pointed out that only roosters have wattles. Too bad. I like the extra red visually, but it has to go. |
 |
| Photo: April 23, 2007
Back to full time work on the book, I made the numbers and started selecting the outer border colors. Fortunately, from some of the Winter Lights quilts, I had a large stash of solid colored fabric, though I did still need to buy several more pieces. |
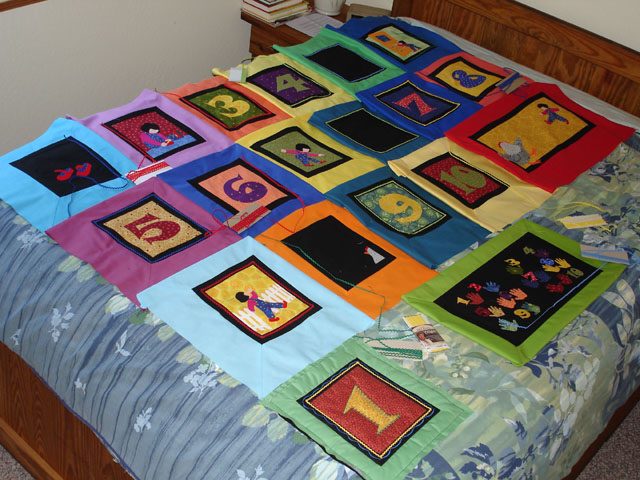 |
| Photo: May 2, 2007
With the pieces all together I had to decide what colors of rick-rack and which stitches to use on each piece. Now that I see the pages all laid out like this, that light blue border with the child going through the gate bothers me. The hands and numbers page above is not the one we'll use. Done actual size, like the other pages, the hands are just too small to stitch, and it will be impossible to fit the buttons on the tips of the fingers--even very tiny buttons! |
 |
|
I put the outer borders on, and using a stabilizer behind the black fabric to keep it from puckering when I stitched, added the fancy stitching and rick-rack on the black borders. |
 |
|
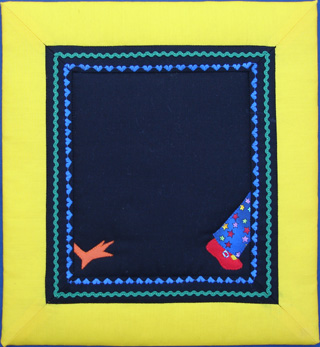
Photo: May 6, 2007 The borders are all done now, but that light blue page still bothers me. If you look at the book you'll see that I redid it. By the way, now that the chicken's wattle is gone, I don't miss it. I've stitched the yarn string and sticks on by hand. As you can see, the hands and buttons page is empty. I have made the frame actual size to be consistent with the others, but will do the hands on a separate piece of art, large enough to stitch and fit in some interesting buttons. It will then be reduced and fit into the frame. |
|
STAGE FIVE: The home stretch...
|
|
Now it's May 9th--I didn't exactly make that May 1 deadline, but the book now has everyone's full attention and is moving along quickly. My sewing machine is humming and the emails are flying back and forth as we make final decisions. The results of the batting tests finally come back, but we still aren't sure what to do. We like the puffiness, but there is more waviness and wrinkling than we'd like. I try stretching one of the samples on a piece of cardboard and scanning it. The stretching seems to work, keeping the waviness and wrinkling to a minimum while letting the puffiness show. We decide to go with the puffy batting. I can finally finish these pages. I "sandwich" the batting between the pieces I've made and some plain backing fabric and quilt them on my sewing machine. I use fancy stitching around the numbers, a button-hole type edge-stitch around the figures, and a straight stitch along the seams on the black inner borders. |
| Meanwhile we've been working on ideas for the jacket and end papers. A friend suggested buttons for the end papers. It sounded like fun, so I snapped a shot... |
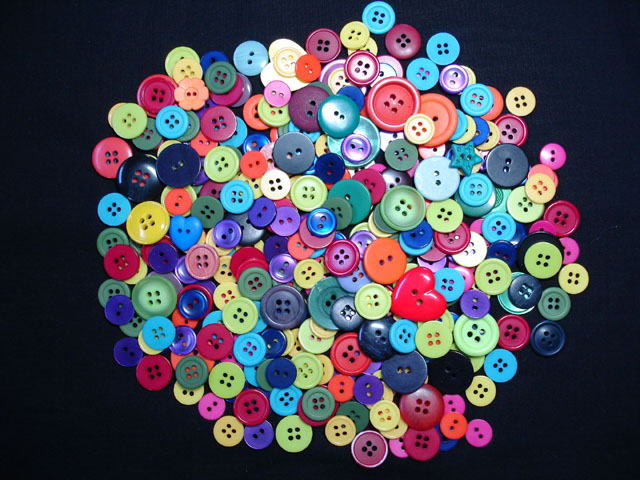 |
| ...then did a little work in PhotoShop. I sent a couple other ideas, too, but we decided to go with this one, professionally done, which meant I had to collect enough buttons to solidly fill a 10 by 11 rectangle. It took a quart, the last cupful scrounged from a friend with a stash. What would I do without my friends? |
 |
| Jeannette, who works in Harcourt's San Diego office, happened to be in New York in July when the photo-shoot was done, so she went to the shoot and made sure the buttons were arranged as we wanted. She got a kick out of being the "button stylist". |
| In early May, Lydia came up with a jacket concept, which we passed back and forth, a few times, making fabric selections, tweaking the design, and deciding it needed a back as well as a front. To aid in stretching, shipping and photographing, I decide to do it in two quilts.
By May 20th, working intensively, I've completed all of the interior art, including stretching it. |
  |
  |
 |
| We've decided on the button endpapers--no sewing there--and have our jacket design. I just have those quilts to do--front and back--plus one for the title page, and another for the copyright page and I'm done. . . or so I think! |
|
Ooops! STAGE SIX: A bit longer to the homestretch...
|
| Then I get another surprising email, this one about the "remaining pages". The team wants not just the title and copyright pages, but quilts for the end flaps, and a whole separate quilt for the case. After I get over the surprise, I'm pleased. The extra effort in design, and my doing a few extra quilts, will make the book really special. Again, the images and ideas go back and forth, and as we work, I am once again thrilled to have all the input. |
  |
| Above are the finished quilts for the title and copyright pages and below is the flap quilt. |
 |
| The last little fun thing I do is to sew the four tiny buttons on the spine of the case, making a total of 171 sewn-on buttons for the book. |
 |
| On June 10th it's all finished, and in their hands by the 12th. Jeannette and her assisitant Jessie Dzundza, write flap copy. Lydia does the mechanicals, sending them to me in late July for my input. A month later we have first proofs to check. It looks good, but some of the colors are a bit off. Pascha Gerlinger, production manager, works on that and in September we have a set of proofs that look really terrific. By spring we'll have a book. What a fun process, it's been!
To recap the time line, for those who like to know how long it takes, I got the call in September of 2006, the offer in November, started working with Jeannette in February, finished the art in June (that's just a little over four months of my work, not counting the initial proposal), and the book is in production in September for a release date in May of 2008. Believe it or not, books usually take longer to go through this whole process...sometimes years! |
 The End...but not really! |
|
|